Using a single Terraform configuration to manage multiple environments, such as development, staging, and production, helps DevOps teams keep these environments consistent. Each environment has its own state file, so changes remain isolated even though they share the same configuration.
For example, if a team tests a larger instance size in staging, this change stays within staging and doesn’t impact production. With remote state storage, each workspace’s state file is stored separately, preventing any overlap between environments and making sure that updates only affect the intended environment. This setup maintains consistency while keeping environments isolated.
This blog will cover what Terraform workspaces are, how to set them up with remote state, how to use environment-specific variables, and how to deploy resources in separate environments easily.
Introduction to Terraform Workspaces
Terraform workspaces allow DevOps teams to manage multiple isolated environments, like development, staging, and production, within a single configuration. Each workspace acts as a distinct environment, keeping configurations and resources separate so changes in one workspace don’t affect others. This setup is especially valuable when you need consistent infrastructure across all the environments without having to duplicate code or configurations.
When combined with a remote state backend, like an S3 bucket or Azure Blob Storage, each workspace has its own state file, which keeps details for each environment separate. For example, the dev workspace’s state file is stored in its own location in S3, separate from staging and prod. This setup prevents changes in one environment from affecting others, allowing teams to manage resources for each environment independently. This separation makes it easier to handle updates and track resources without risking overlap between environments.
Now, to keep each environment stable, using state locking in a remote backend is also important. By pairing S3 with a DynamoDB table for state locking, Terraform makes sure that only one user or process can make changes at a time within the same workspace. This prevents issues like overlapping changes, where one person’s updates might interfere with another’s, leading to errors like resource duplication or configuration mismatches during deployments.
Each workspace keeps its own state file in remote storage, which helps track resources specific to that environment, manage changes, and roll back updates if needed. If an update causes issues, such as breaking changes in the staging environment, the state file for staging can be restored without affecting production or development. This separation also makes troubleshooting easier, ensuring that environments like dev, staging, and prod remain independent and can be managed effectively in a centralized backend, like an S3 bucket.
Key Commands for Managing Workspaces and Setting Workspace-Specific Variables
Now, let’s dive into some of the important Terraform commands for creating and managing workspaces. We’ll also show how to set workspace-specific variables, allowing you to control configurations, such as instance size, tags, and region, within each environment. This approach allows you to customize configurations for each workspace without duplicating code, all while keeping state files isolated and organized in the remote backend.
Creating a New Workspace
To create a new workspace, use the terraform workspace new command. This sets up a unique workspace for each environment in the remote backend, allowing you to isolate environments like dev, staging, and prod within a single configuration file while keeping them organized and separate.
For example, create a workspace named staging:
This command creates a new staging workspace, keeping it separate from other environments and organized within the remote backend.

Switching Between Workspaces
To switch between workspaces, use the terraform workspace select command. This sets the specified workspace as the active environment, allowing any actions you take to apply specifically to that workspace only. For example, switch to the prod workspace:
Terraform will now switch to the prod workspace, ensuring that any configurations or deployments you apply are specific to this environment.

Listing All Available Workspaces
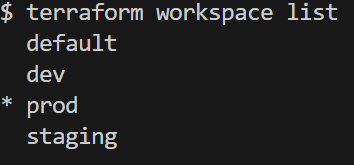
To view all existing workspaces, use the terraform workspace list command. This command will display a list of all workspaces within the configuration, with the currently active workspace marked by an asterisk. This helps you easily see which environments have been set up and identify the workspace that is currently in use. For example, you can see all the workspaces with:
The output will show a list of workspaces, such as dev, staging, and prod, with an asterisk next to the prod, which is the active one.
Checking the Active Workspace
To only confirm which workspace you are currently working in, use the terraform workspace show command. This is a quick way to check your active environment before making any changes, making sure that you’re working in the correct workspace. This helps you avoid unintended changes in the wrong environment.
For example, here, the name of the active workspace is prod.

Deleting a Workspace
When a workspace is no longer needed, you can remove it with the terraform workspace delete command. This command deletes the specified workspace and its state file from the remote backend, ensuring no outdated workspaces are available or worked upon.
For example, delete the dev workspace:
This command removes the dev workspace entirely, preventing any future modifications or deployments in that environment.

Setting Workspace-Specific Variables
Once your workspaces are set up, you can define variables for each environment to customize configurations, like instance size, tags, and region, within a shared setup. This approach lets you adjust configurations for each environment without needing separate files for each one. This customization is especially valuable in remote state setups, where each workspace can have different configuration requirements while maintaining shared infrastructure code.
Using terraform.workspace for Environment-Specific Configurations
The built-in terraform.workspace variable allows you to set values based on the active workspace, making it simple to customize configurations for each environment without duplicating code. For example, we can set specific instance sizes, tags, and regions depending on whether we’re working in dev, staging, or prod.
In this configuration:
instance_typeis customized based on the workspace: t3.large for prod, t3.medium for staging, and t3.micro for dev.environment_tagautomatically adopts the workspace name, allowing easy tagging by environment.regionis set to us-east-1 for the prod environment and us-east-2 for dev and staging, allowing each environment to deploy resources in its own specific region.
Once these variables are defined, use them in your resource configurations to deploy environment-specific setups. For example, to set up an EC2 instance based on the active workspace, you might use:
This resource configuration applies the workspace-specific variables we defined earlier, making sure that each environment, whether it’s dev, staging, or prod, is created with its own configuration for instance_type, region, and tags.
When you switch to a different workspace, Terraform automatically uses the corresponding variables, making each environment distinct using the same configuration.
Setting Up Terraform Workspaces with Remote State
As we have covered the essentials of how Terraform workspaces work with remote state, let’s dive into a hands-on setup. This will walk you through configuring Terraform workspaces with the remote state on AWS to manage dev, staging, and prod environments in an organized, isolated way.
Step 1: Configure AWS Backend
Now, to set up the remote backend, we’ll configure an S3 bucket to store the state files and use DynamoDB for state locking. Here’s the Terraform code for the backend configuration:
In the backend configuration:
- S3 Bucket: The bucket parameter defines where the state files are stored. Each workspace will have its own key, keeping state files separate.
- DynamoDB Table: The dynamodb_table parameter enables state locking, preventing multiple users from making changes simultaneously in the same workspace.
Step 2: Initialize and Create Workspaces
Now, initialize your Terraform code with terraform init command. It will configure the backend, connecting to the S3 bucket and DynamoDB table we set up for state storage and locking.
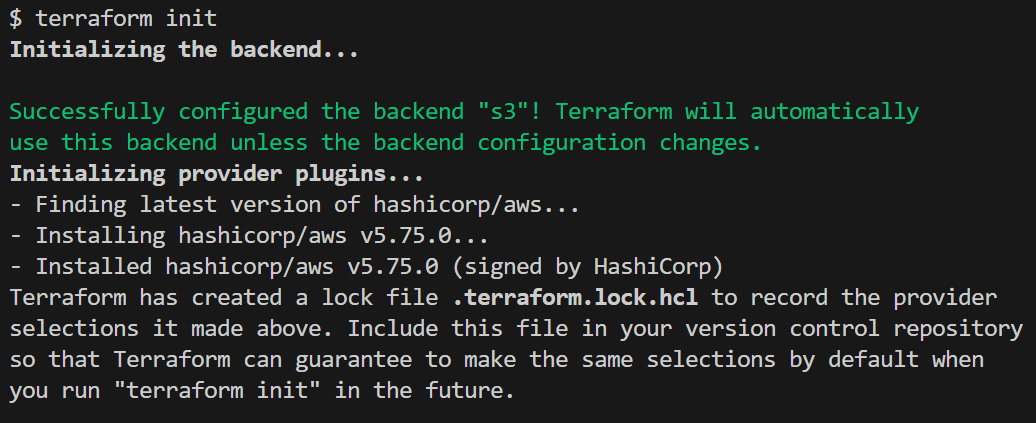
Now, to create and isolate each environment as a workspace, we’ll set up dev, staging, and prod workspaces. Each workspace will have its own state file stored in the S3 bucket, keeping configurations separate and organized.
Create the dev workspace with terraform workspace new dev command:

Create the staging workspace by using terraform workspace new staging command:

Create the prod workspace by using terraform workspace new prod command:

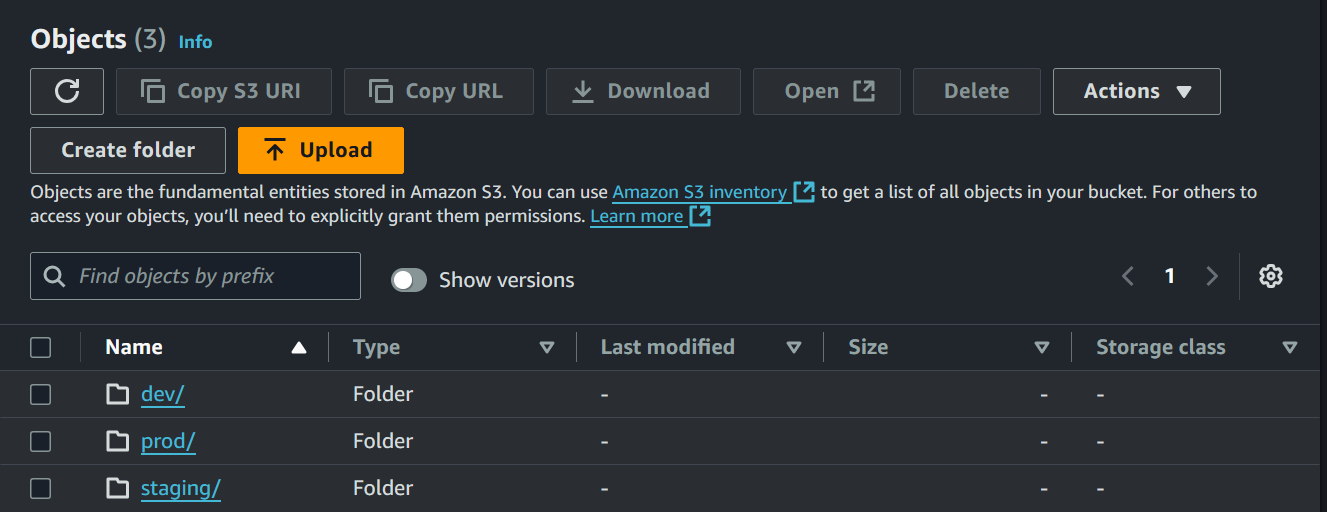
After running these commands, each environment, dev, staging, and prod will have its own isolated state stored in the S3 backend. This setup ensures that environment-specific changes are done within each workspace.
Step 3: Define Environment-Specific Variables
Now, by using the terraform.workspace variable, you’ll set different instance types for each environment. Here’s how you can do it:
In this configuration:
- The
instance_typeis set based on the active workspace. prod uses t2.large, staging uses t2.medium, and dev defaults to t2.micro. - This keeps instance sizes specific to each environment, enabling isolated resource configurations.
Step 4: Apply Configurations in Each Workspace
With the workspaces and variables configured, it’s time to deploy resources to each environment, keeping them isolated and specific to their respective configurations. To make sure configurations apply to the correct environment, start by selecting the desired workspace, such as dev, and then run terraform apply. This way, any changes or resources you deploy will be scoped only to that environment’s state file, preventing unintended overlap with other environments.
For example, to deploy to the dev environment, you would use:
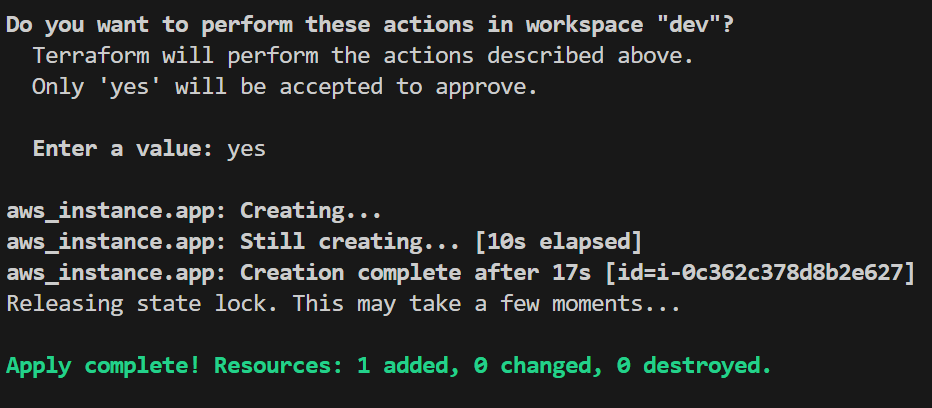
Next, to deploy resources for the staging environment, switch to the staging workspace to makes sure that all configurations apply specifically to it. This keeps the staging resources isolated and separate from dev or prod.
Run the following commands:
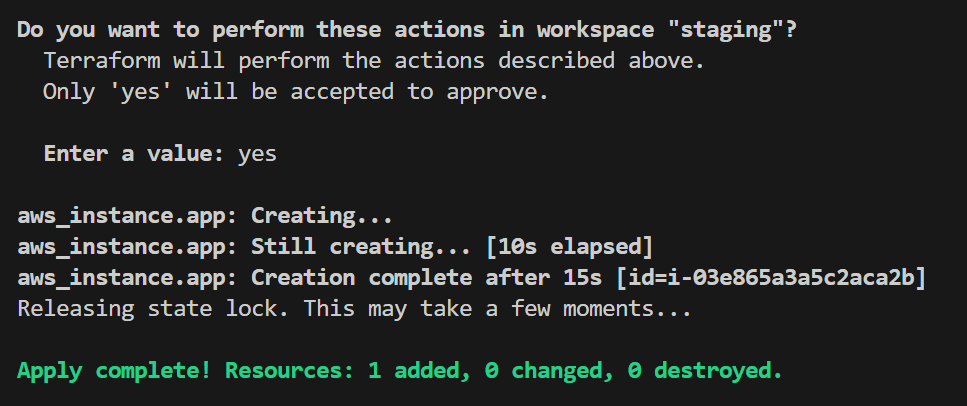
Finally, select the prod workspace and apply the configuration for production by running the following commands:
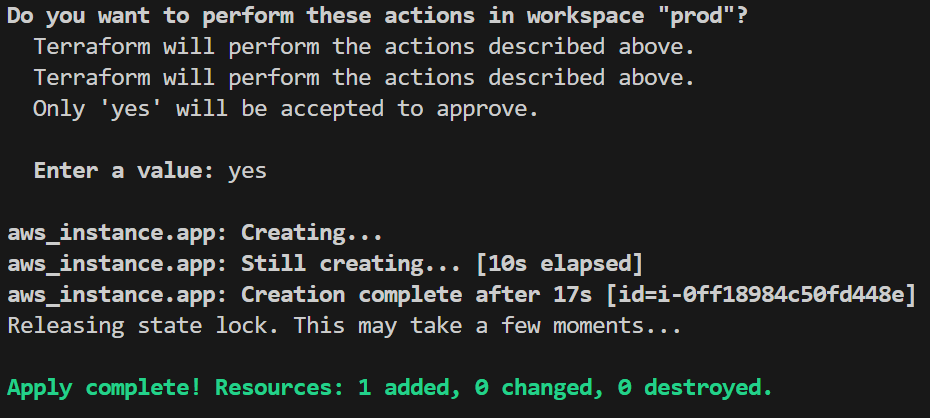
Once deployments are done, the separate state files are stored in the S3 bucket paths for dev, staging, and prod.
With each environment’s state stored in isolated paths within the S3 bucket, Terraform ensures that changes are restricted to the selected workspace, enabling organized, secure multi-environment management.
Comparison of Terraform Workspaces, Modules, and Directories
In Terraform, you can manage multiple environments, such as development, staging, and production, using workspaces, modules, or directories. Each method has its strengths and is suited to different needs. Here’s a comparison to help you decide which approach works best based on isolation, flexibility, and ease of management.
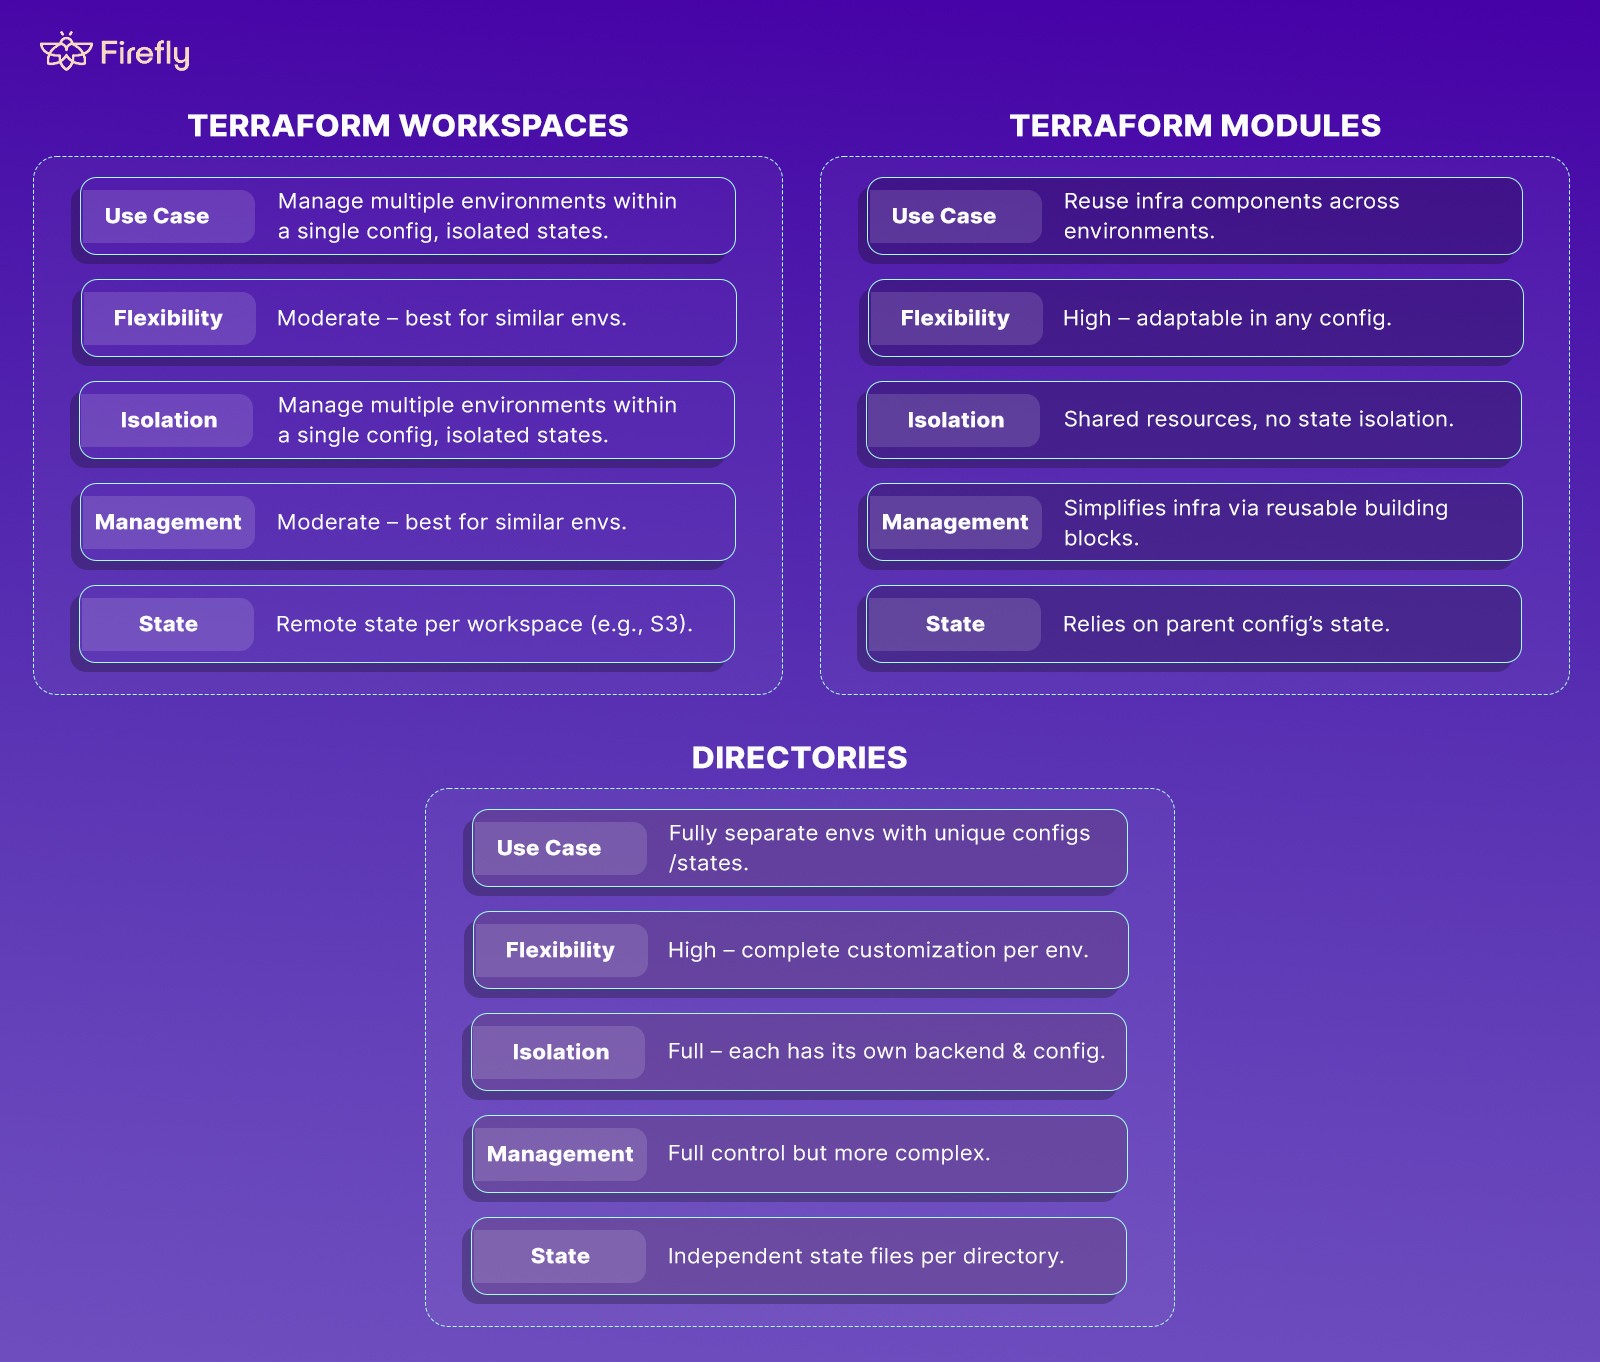
Now, you can easily decide which one of them to implement as per your use case based on this knowledge and the following:
- Workspaces are ideal when you need isolated state files but want to keep all environments within a single configuration.
- Modules work well for reusing components across different setups without isolating the state.
- Directories provide complete separation, with each environment having its own configuration and state file, making them suitable for complex setups or when environments need full independence.
When you’re working with a mid-size to large infrastructure setup, managing multiple workspaces within a remote backend can quickly become complex. Each environment, such as dev, staging, and prod, has its own state files, and resources, which need to stay isolated yet easy to track. Without proper management, configurations can drift, changes may unintentionally affect multiple environments, and teams can lose track of which resources are assigned to each environment.
Why Make Firefly Your Solution of Choice?
Firefly’s IaC Explorer solves the challenges of managing complex infrastructure by providing a single, organized view of your entire resource stack. Here, you can see all backends and their associated workspaces in one place, making it easy to understand which backend manages each environment and how many resources are assigned to each.
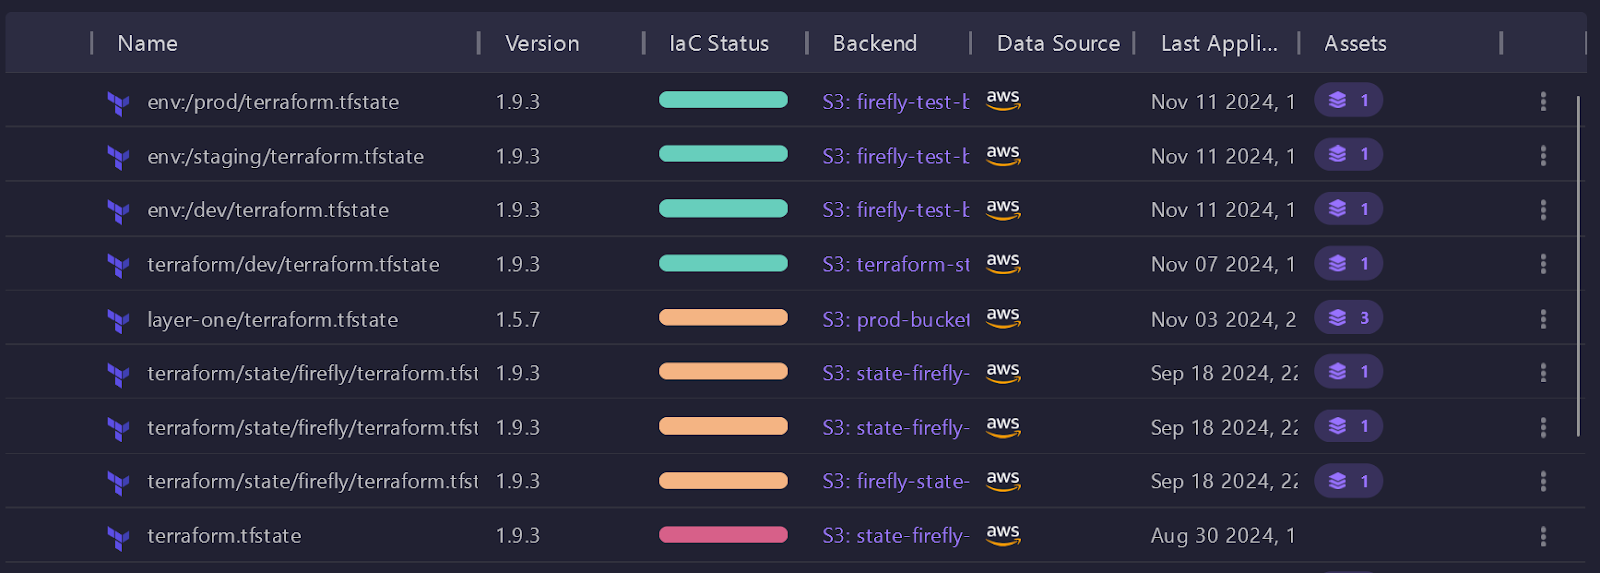
IaC Explorer offers a clear overview of each workspace’s backend location, such as an S3 bucket, which helps keep state files organized and accessible. The dashboard displays the total number of resources within each backend, allowing you to quickly see how assets are distributed across environments like dev, staging, and prod.

This unified view simplifies management by clearly showing where each environment’s resources are located, which helps prevent cross-environment changes and reduces the risk of unintended modifications.
For deeper insights, you can click on any backend stack to view detailed information about the resources within that workspace. Each resource displays unique identifiers, such as the resource ID, making it easy to track and manage individually. Tags, like “staging” or “production,” help with organizing and filtering resources by the environment, while region details indicate where each resource is deployed, which is useful in multi-region setups. The status of each resource is also displayed, enabling you to quickly identify any issues that might need attention.
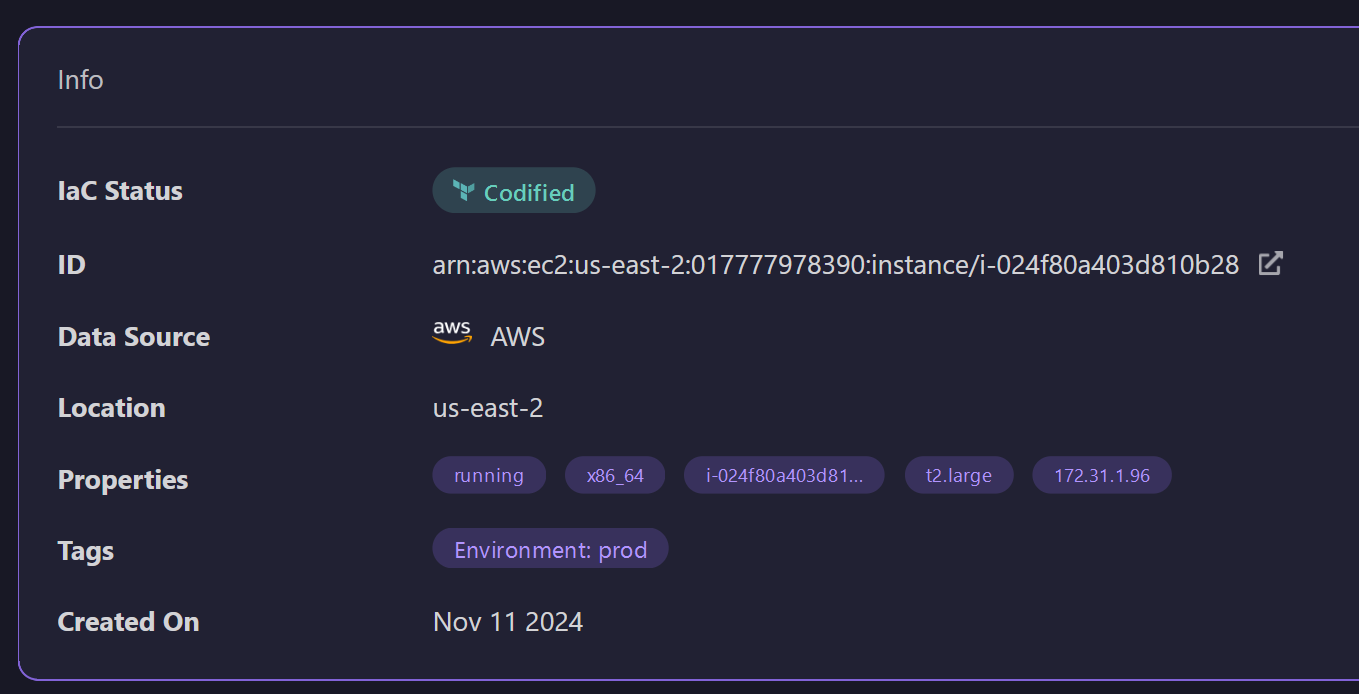
By centralizing all backend and workspace information, Firefly’s IaC Explorer simplifies infrastructure management, providing visibility into all environments in one place. You can see exactly which resources belong to each workspace, track backend locations, and access detailed metadata with just a few clicks. This setup reduces the risk of cross-environment errors, keeps configurations consistent, and empowers teams to handle complex infrastructure confidently and easily.
To see Firefly in action, request a demo.
FAQs
What is the difference between Terraform modules and workspaces?
Terraform modules are used to organize and reuse infrastructure code.
Workspaces let you use the same code to create separate state files (like dev, staging, and prod) without copying folders.
Modules = code reuse. Workspaces = state separation.
What is the purpose of a Terraform workspace in either open-source or enterprise?
A workspace isolates Terraform state so multiple environments don’t affect each other.
In Terraform Cloud/Enterprise, a workspace is the deployment unit, it has its own state, variables, run history, and access controls.
What is Terraform workspace variable?
A workspace variable is a variable that belongs to a specific workspace. In Terraform CLI, you use terraform.workspace to switch values based on the active workspace. In Terraform Cloud/Enterprise, each workspace stores its own Terraform and environment variables.
Is Terraform workspace free?
Yes. Workspaces in the open-source Terraform CLI are free. Terraform Cloud also supports workspaces on the free tier, with limits on resources and features.


