Firefly just announced our newly minted Azure integration for multi-cloud asset management, extending Firefly's cloud management capabilities to all three major cloud providers ––AWS, Google Cloud, and now Azure Cloud. For those who missed the announcement, this now brings the benefits of Infrastructure-as-Code (IaC) acceleration, proactive governance and risk mitigation, enhanced engineering team efficiencies, and a next-gen CMDB to Azure cloud, making it possible to manage all of your cloud assets in a single place.
Here, we'll quickly walk you through how to connect your Azure Cloud into your Firefly dashboard so you can get started right away.
Getting Started with Azure Cloud in Firefly
When our team started designing and building the out of the box Azure integration for Firefly, it was important that the tools be ones Azure users are most comfortable with. This is why we chose Azure Cloud Shell as the way to get started, which is a core service in every Azure subscription, and Azure cloud engineers enjoy using most.
Just like the many other integrations Firefly supports out of the box, you simply navigate to Settings >> Integrations, click on `Add New` and select the Azure logo.
Note, before getting started, adding the Azure integration to the Firefly platform requires Azure Cloud Shell access. Make sure the Cloud Shell is configured, and ensure you have sufficient permissions to create app registration. This can also be acquired via your Terraform role if not explicitly available in Azure, on your personal user, but the best practice is for this to be available through your Azure personal user.

You will then be led through a wizard to complete your Azure setup.
You’ll get started by entering your Azure subscription’s GUID, and select how you’d like your assets to be managed:
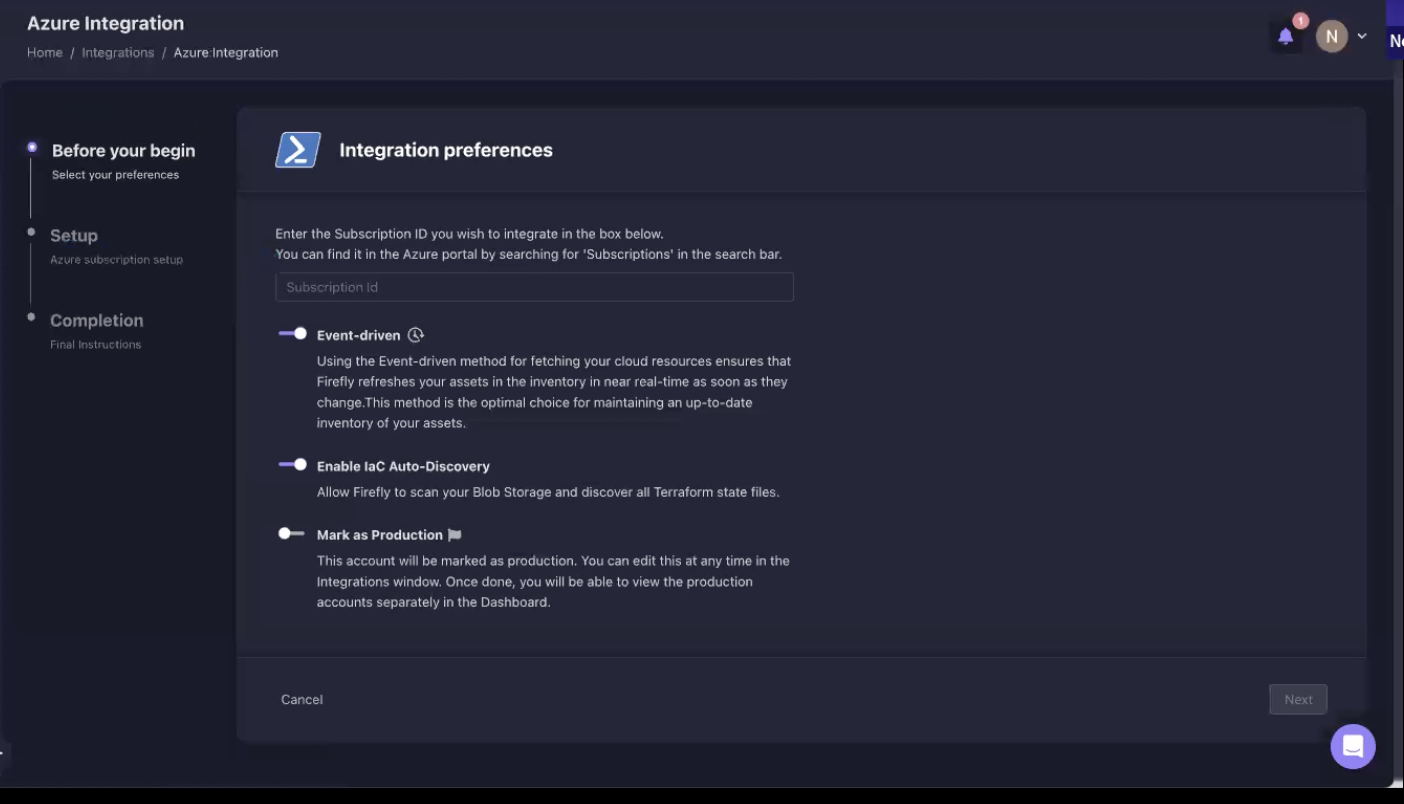
- Event Driven
Enables you to track your assets in near real time (Recommended)
- Enable IaC Auto-Discovery
To detect and index Terraform State Files. This works much in the same way on Azure blob storage as it does with Amazon S3
- Mark as Production
Select this toggle if this account is associated with production environments
We previously mentioned that the person installing the new Azure support will need to have sufficient Azure Cloud Shell permissions to do so. In this next step this is where Cloud Shell needs to be configured to complete the wizard and get started.
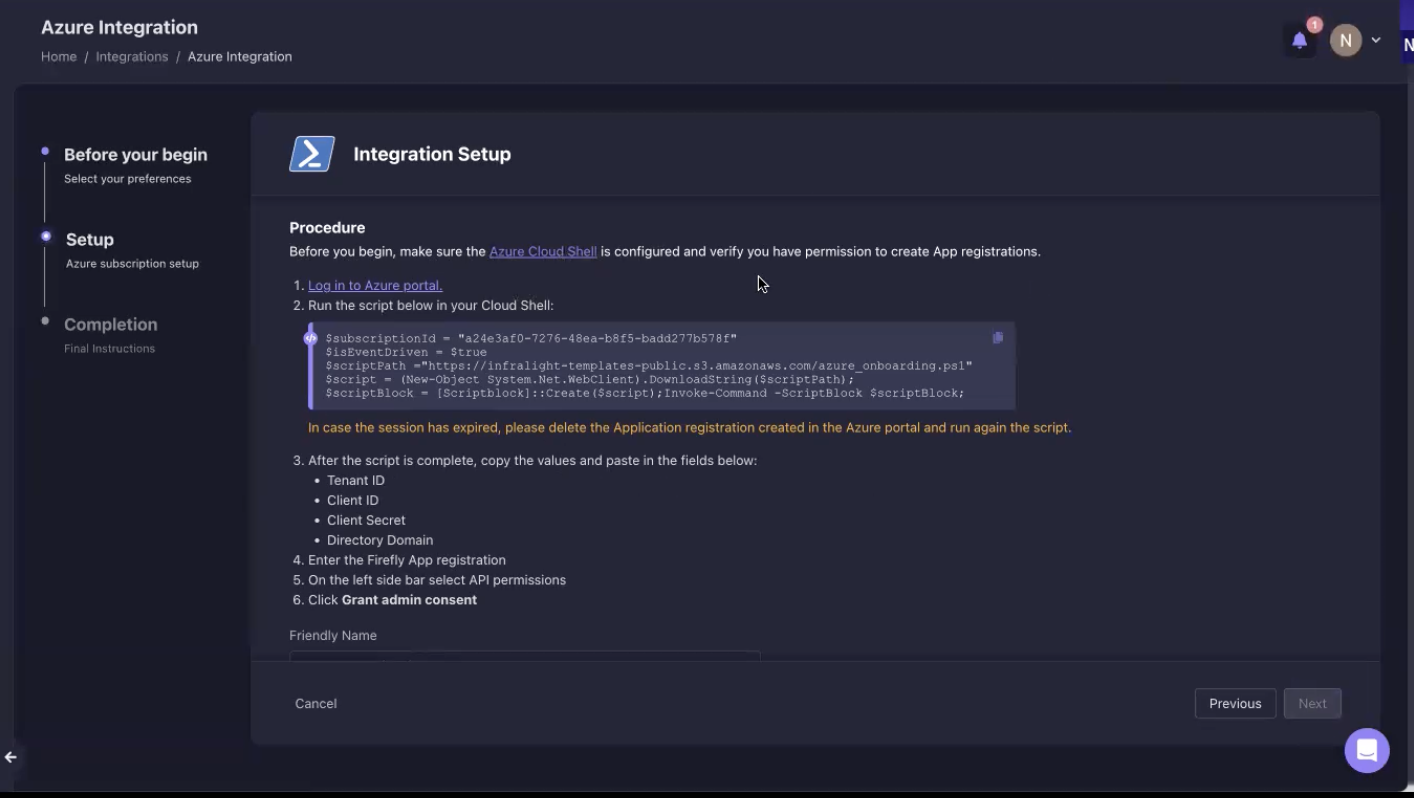
Next you login to the Azure portal, and run the following script in your Cloud Shell:
$subscriptionId = "a24e3af0-7276-48ea-b8f5-badd277b578f"
$isEventDriven = $true
$scriptPath ="https://infralight-templates-public.s3.amazonaws.com/azure_onboarding.ps1"
$script = (New-Object System.Net.WebClient).DownloadString($scriptPath);
$scriptBlock = [Scriptblock]::Create($script);Invoke-Command -ScriptBlock $scriptBlock;
After the script finishes running, you will need to copy the following values to complete the setup:
- Tenant ID
- Client ID
- Client Secret
- Directory Domain
Return the Firefly wizard, and paste these values into the corresponding fields:
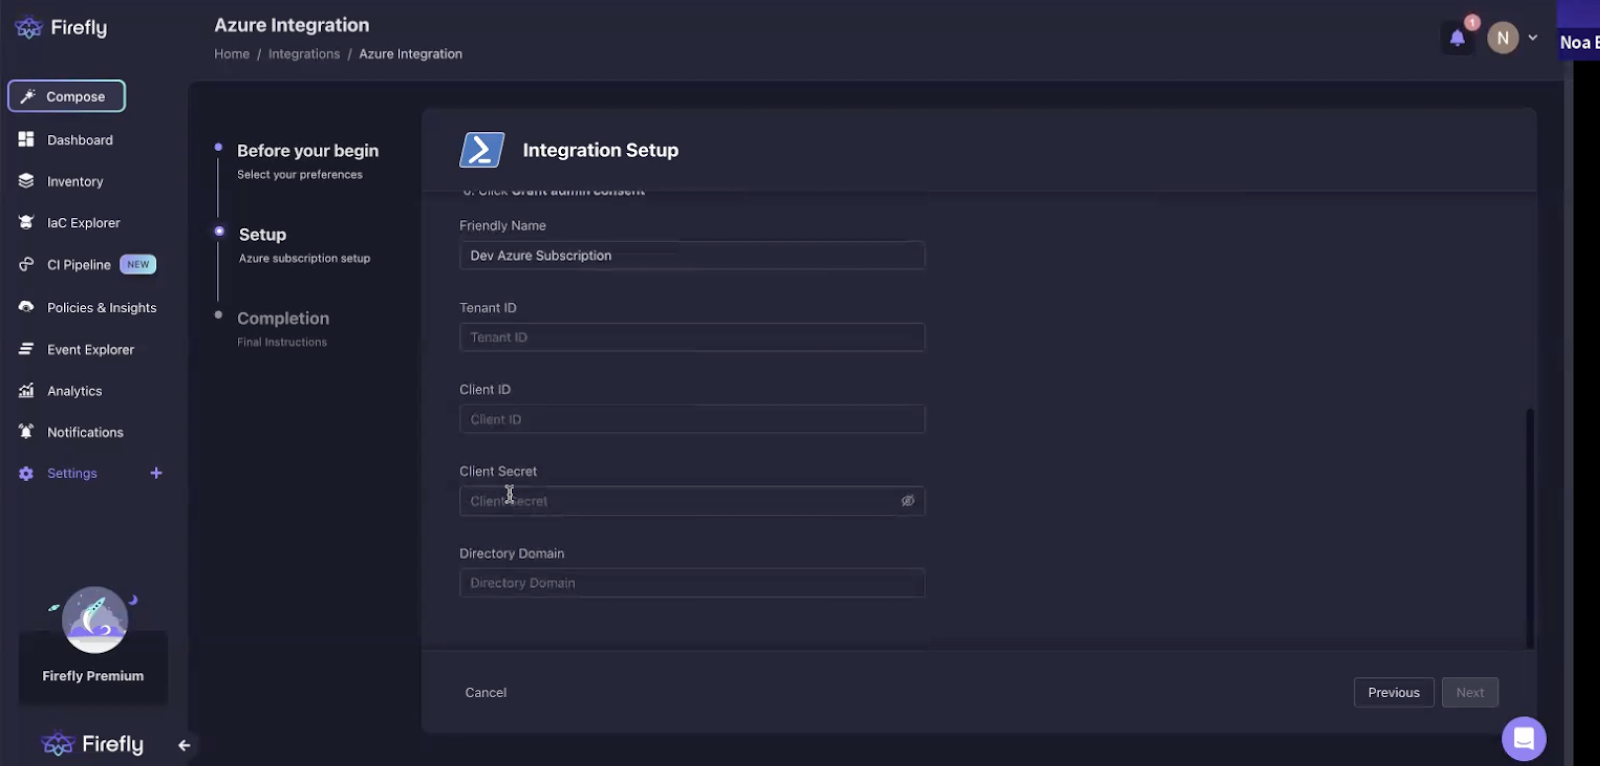
That’s it! Your setup is complete and Firefly is now able to run on your Azure Cloud to scan resources.
How it Works
Once the setup is complete, Firefly will immediately start scanning the account, and you will see the cloud assets associated with your Azure subscription account start to populate under the inventory tab. This is where you will be able to start viewing and managing your cloud assets immediately.
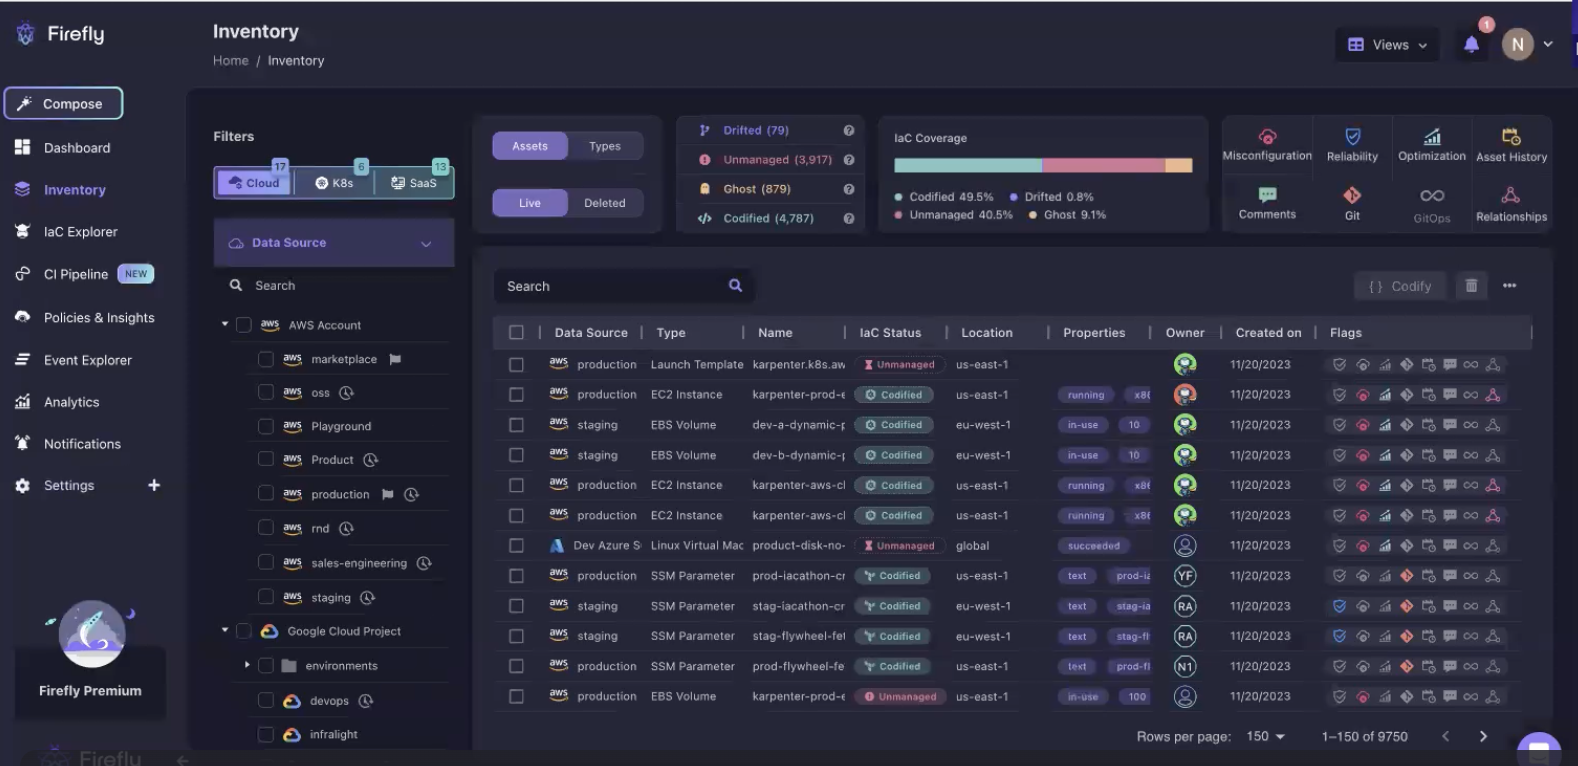
You will also now be able to find the Azure integration live under Settings >> Integrations and if you click into it will find more configuration capabilities.
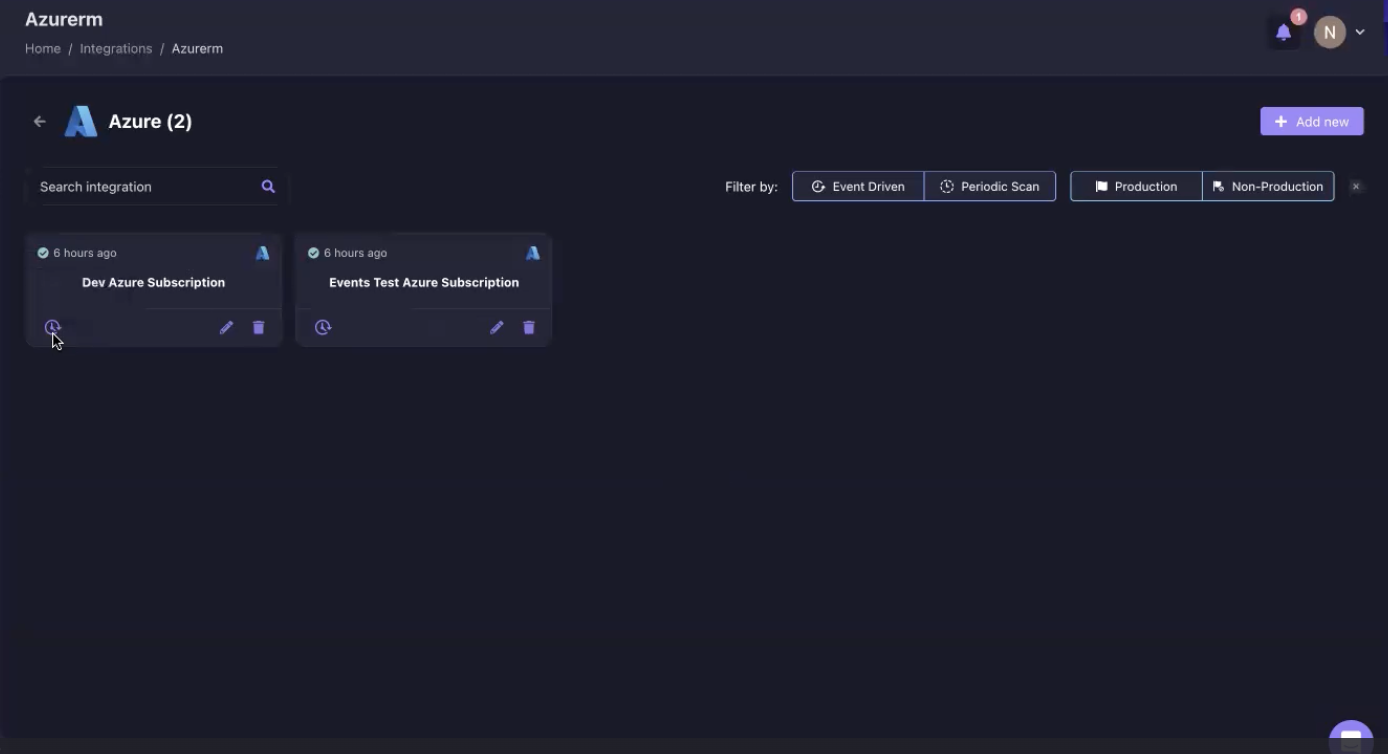
This is also where you can change the configuration options you selected in the initial setup - such as the event-driven capabilities or marking this as a production account.
Azure Security is a Priority with Firefly
Since we know that one of the greatest features Azure Cloud offers its users is its robust security, the Firefly team built this into the design to ensure security and access control is maintained when using the Azure integration in Firefly.
Like all other integrations, the Azure integration permissions are all read-only, and you have the choice of assigning three different roles to your users, including Security Reader, Billing Reader, and Reader. In addition, this integration leverages the security and permissions-minded Azure Resource Manager service, that enables you to define access control for resource configuration, and have greater governance and control over user access. This means that there is no direct access to any resources in your Azure account when using Firefly cloud asset management.
Multi-Cloud Asset Management Simplified
This new out of the box integration in the Firefly platform now makes multi-cloud management and operations at scale much simpler for large engineering organizations running a diversity of assets and resources across clouds and SaaS products. This provides a much wider scope of IT governance not previously possible, enabling organizations to better manage risk, and consolidate their configuration management to a single place in this new and truly multi-cloud CMDB.
This unified inventory makes it possible to assess and manage multiple clouds, Kubernetes, and SaaS applications that power modern cloud native environments. Azure Cloud now completes Firefly's support for the major cloud providers, and offers a single pane of glass across clouds and SaaS tools, to ensure no asset is left behind or unmanaged in a chaos of clouds.
Let Us Hear from You
We are only just getting started and unveiling this new support and expect to enhance the support with ARM and Bicep templates soon, as well as Azure-specific policies. Please share with us the resource types and services you’d like to see supported by Firefly in our next iterations, and your user experience feedback so we can constantly improve.
Not using Firefly yet?
Schedule a demo to see how Firefly can help you achieve a well-managed cloud infrastructure.


